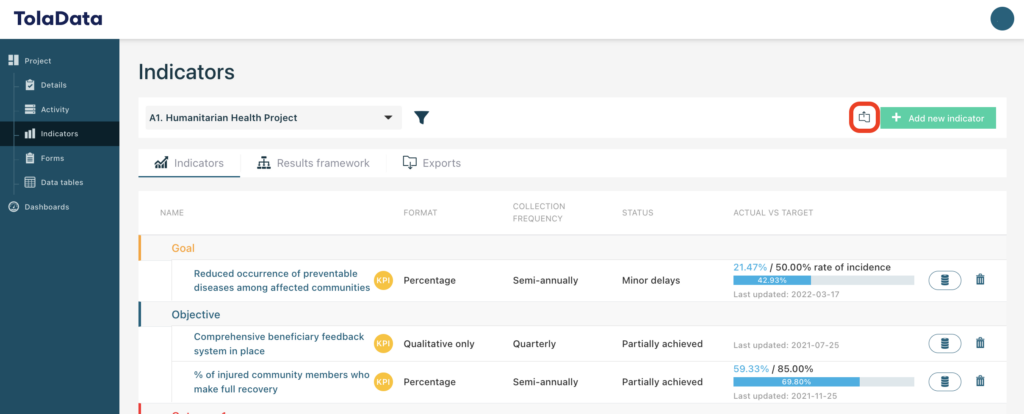
Navigate to the ‘indicators’ tab of your project.
To add a new indicator click on the green ‘+ Add new indicator’ icon.
To import indicators in bulk there is a template function. To access this click the ‘import indicators in bulk’ icon below.

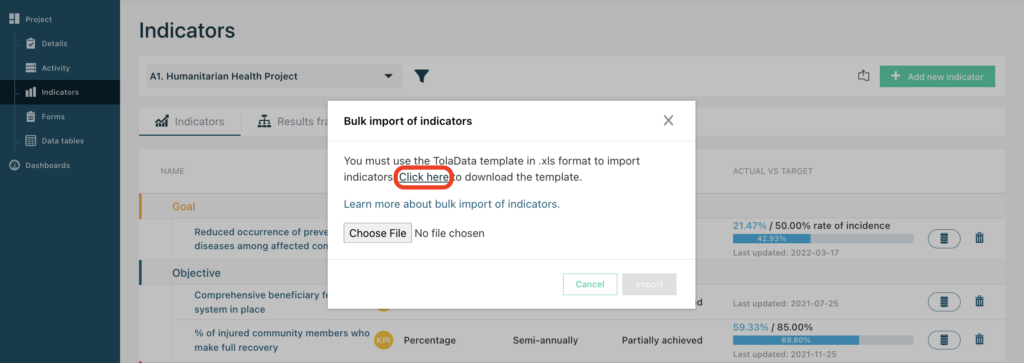
Download the template from the link in the pop-up, highlighted below.

Fill in the template with your indicators keeping in mind:
- For each indicator, fill one line.
- There are two required fields for each indicator and they are highlighted in orange in the template, indicator name and format. These must be filled in for each indicator, otherwise the import will fail. Other fields can remain empty.*
- Several fields use a drop-down menu. Only values from these menus can be read by our system.
- Once you’ve filled the template, simply save it in ‘XLSX’ format
*Please note for numeric and percentage indicators the ‘Expected direction’ should also be filled using the drop down-option.
Hints regarding specific fields:
- Indicator name: this field has a character limit of 255 characters.
- Expected direction: most indicators have an increasing direction (ie you are trying to increase towards your target) which is our default value.
- Target value and baseline value: please only enter numbers into this field. If you specify a percentage indicator, please add a percentage sign (i.e. ‘90%’ instead of ‘90’).
- Baseline date: this field accepts dates in the format YYYY-MM-DD.
To ensure the template will upload, it must be in the exact format specified:
- Do not edit the header row or change the order of columns of the template sheet.
- Do not add any text outside of an indicator line, otherwise the import will fail.
- Make sure to save the template in XLSX format.
To upload, click the ‘import indicators in bulk’ icon and this time select ‘Choose File’. Add your new bulk import template and click ‘Import’.

Finally, order your indicators as required.
If you have any questions, please feel free to reach out to our customer support v


