To analyse your results incrementally through your project, you can add reporting periods with specific targets. You can add annual, semi-annual, quarterly and monthly reporting periods, as well as custom reporting periods.
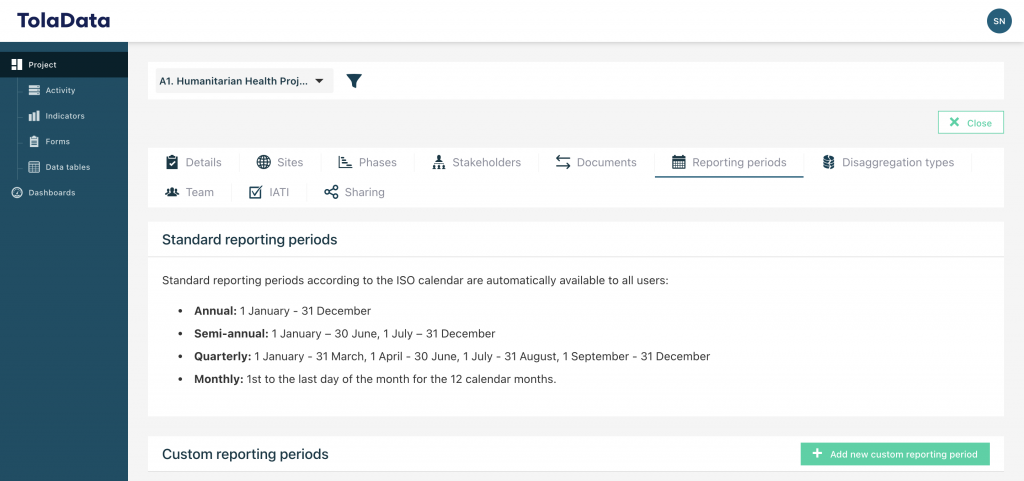
Standard reporting periods: these are preset in TolaData according to the standard calendar periods (eg. annual = January – December).
Custom reporting periods: custom reporting periods can be set up for your projects to align with the requirements of your donors and logframes – this makes monitoring against targets and reporting your results even easier. This type of reporting differs from standard reporting periods (such as annual periods from 1 January to 31 December) because you can create your own personalised period, for example an annual period from 1 July to 30 June.
Custom reporting periods are created and managed at the project level under the ‘Reporting periods’ tab.

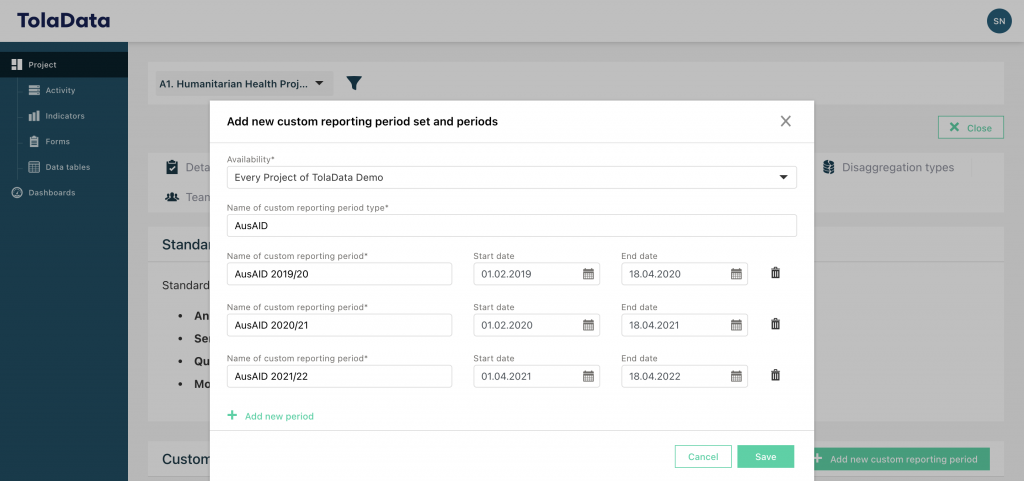
To add a new reporting period, click ‘Add new custom reporting period’ and then:
- Select the availability for your reporting period. This can be specific to one project or to your entire organisation.
- Enter the name of your reporting period set.
- Create and name each individual reporting period and add the start and end dates. You can come back and add more periods to a set at any time, allowing you to expand the specific set year on year.

You can then use this custom reporting period to set targets on an indicator.
Availability
It’s important to choose the correct availability for your reporting period set so that it can be reused on other projects. This saves your teams from having to recreate the same reporting periods multiple times if they are used frequently in your projects. There are two levels of availability for a reporting period:
| Availability | Definition | Reason for use | Can be created/edited by |
| For this project only | A period set that is unique to this project and will not be used on any other projects | A period set that will be issued on this one project but not on any other projects. Allows you to use that period set to break down your projects indicator results by reporting period. | Org AdminsProject Admins of that project team |
| For every project of your organisation | A period set that is used on multiple indicators across multiple projects | For periodic targets that your organization uses frequently or often reuses. | Org Admins |
How to apply custom reporting periods to indicators
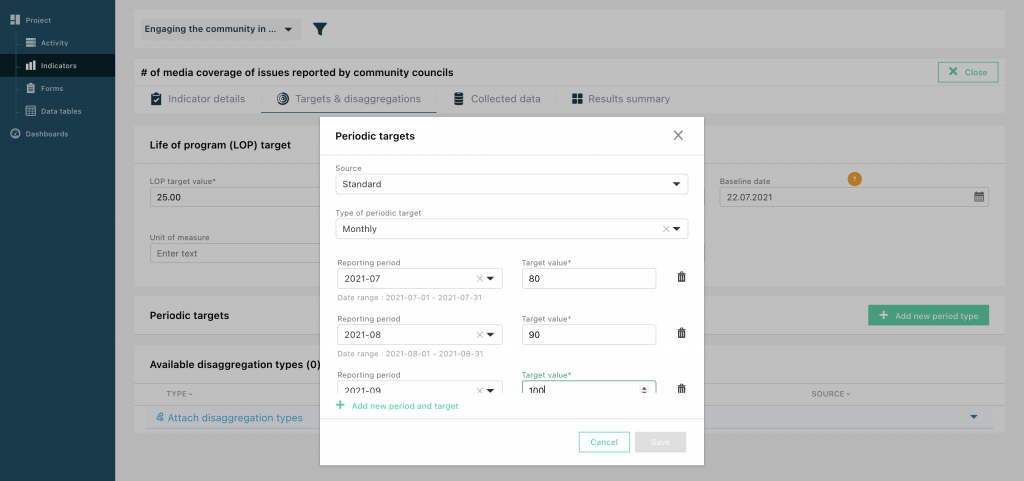
To add a reporting period, first select an indicator. Then, select the ‘Targets & disaggregations’ tab. To add a new reporting period, click ‘Add new period type.’
If you have created custom reporting periods, then first, you will need to select if you want to apply standard or custom periods to this indicator.
Then, select the type of periodic target (ie. annual, semi-annual, quarterly, etc), choose the relevant reporting periods for your project and enter the corresponding targets.

How to analyse your results by reporting periods
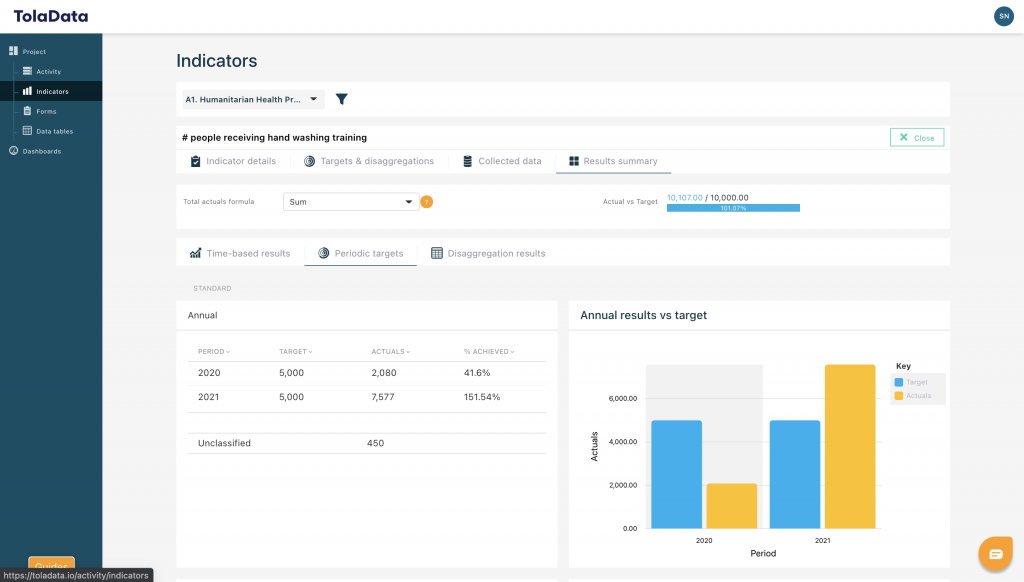
Once you have set up periodic targets, all data entered in the collected data section will be automatically analysed against the relevant target based on the collected date entered.
You can keep track of your actuals versus targets in the ‘Results summary’ tab. Here the target, actual, and % achieved are broken down by reporting period. These results are also accompanied by a graph for easy visualization of results.

